Are you tired of the hassle of hand washing your clothes or relying on a laundromat? It’s time to take control and learn how to use a washing machine.
With just a few simple steps, you can have fresh, clean clothes without leaving the comfort of your home.
Using a washing machine may seem daunting at first, but with our comprehensive guide, you’ll be an expert in no time.
From familiarizing yourself with the parts of the machine to properly treating stains, we’ll cover everything you need to know for perfect laundry every time.
So why not embrace innovation and convenience by mastering this essential household appliance?
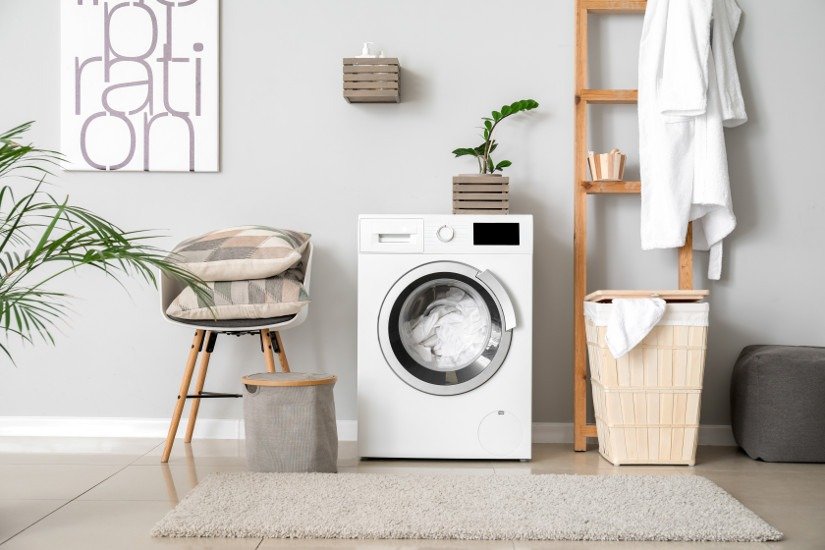
Familiarize Yourself with the Parts of the Machine
Before ya start pressin’ any buttons, make sure ya know the ins and outs of this bad boy, like where the agitator is located for example.
One of the essential aspects of using a washing machine is to identify its parts correctly. Take note of the control panel that houses all the buttons and knobs – it’s where you’ll select your preferred wash cycle and set the water temperature.
Locate the door where you’ll load your laundry, which may vary in size depending on your machine’s capacity.
Another important part to locate is the detergent dispenser drawer, which may have multiple compartments for different types of detergents or fabric softeners.
If you’re experiencing problems with your washing machine, knowing how to troubleshoot common issues will save you time and money in repairs.
Additionally, regular maintenance tips such as cleaning lint filters or checking for leaks can help prolong your machine’s lifespan.
Familiarize yourself with replacement parts like belts or hoses so that if they need replacing down the line, you’re well-prepared.
Now that ya know all about yer washing machine’s components, it’s time to gather up yer laundry!
Gather Your Laundry
You’re ready to throw your dirty clothes into the washer, but make sure you don’t forget any items that might be hiding around the house!
Before you start loading up your machine, it’s important to properly sort laundry. Separate whites from darks and delicates from heavier fabrics. This will prevent color bleeding and ensure that each item is washed at the appropriate temperature.
If you have tough stains on your clothing, it’s best to treat them before putting them in the wash. There are several tips for removing tough stains such as grease or grass stains. For example, rubbing a small amount of dish soap onto a stain can help lift it out before washing. You can also try soaking the garment in a mixture of vinegar and water overnight before washing.
Now that you’ve gathered all of your laundry and sorted it appropriately, it’s time to pre-treat any stubborn stains (if necessary).
Pre-Treat Stains (If Necessary)
If you’re struggling to remove tough stains from your clothes, don’t worry! There are several stain removal techniques that you can use before loading your laundry into the washing machine.
Common stains such as grease, blood, and ink can be pre-treated using a variety of products like bleach, vinegar, or hydrogen peroxide. Eco-friendly stain pre-treatment options include natural ingredients like baking soda, lemon juice, and essential oils.
To pre-treat a stain, first identify the type of stain and choose an appropriate solution. Apply the pre-treatment product directly onto the stained area and let it sit for at least 10 minutes before washing. For tougher stains, you may need to scrub gently with a brush or sponge to loosen up the dirt.
Once you’ve finished pre-treating all of your stained clothes, simply load them into the washing machine and continue with the next step.
Load Your Clothes into the Machine
Let’s get your laundry into the washer and start cleaning those clothes! Before you load your clothes, it’s important to sort them by color, fabric type, and level of soiling. Sorting techniques can help prevent color bleeding or damage to delicate fabrics during the wash cycle.
Once you’ve sorted your clothes, it’s time to add them to the washer. Make sure not to overload the machine as this can prevent proper cleaning and cause damage. The general rule of thumb is to fill the machine about three-quarters full with clothes.
It’s also important to use the right amount of detergent for your load size and soil level. Overusing or underusing detergent can affect how well your clothes are cleaned. Keep in mind that different types of fabrics require specific detergents, so be sure to read labels carefully before selecting one.
Now let’s move on to adding detergent without delay!
Add Detergent
As you load your freshly sorted laundry, don’t forget to add the right amount of detergent to ensure your clothes come out clean and fresh-smelling. Whether you prefer a liquid, powder or pod detergent, make sure it’s appropriate for the type and color of fabric you’re washing.
A few tips on adding detergent:
– Types of detergent to use
– Powder detergents are excellent for removing stains, but they can leave residue in front-loading machines.
– Liquid detergents are great for pre-treating stains and have less chance of leaving residue.
– Measuring the correct amount of detergent
– Always follow the manufacturer’s instructions on how much detergent to use based on the size of your load.
– Use too little and your clothes might not get clean; use too much and you could damage your machine.
Now that you’ve added the right amount of detergent, it’s time to select the right cycle.
Select the Right Cycle
Now that you’ve added the detergent, it’s time to move on to the next step in using your washing machine: selecting the right cycle.
Don’t just settle for a standard wash – most modern machines offer cycle customization options that can help save energy and water while still getting your clothes clean.
Take a look at your machine’s manual or digital display to see what options are available. Many models have special cycles for delicate fabrics, heavy-duty loads, or items that need extra rinsing.
Some machines also offer energy efficient washing options that use less water and electricity without sacrificing cleaning power. By taking advantage of these features, you can save money on your utility bills and minimize your impact on the environment.
Adjust Water Temperature (If Necessary)
Don’t forget to check if you need to adjust the water temperature before starting the cycle – it can make a big difference in how effectively your clothes are cleaned!
Different fabrics require different temperatures to get clean, so it’s important to choose the right one. Here are some tips to help you adjust the water temperature:
– Benefits of using cold water: It saves energy and money on your utility bill, keeps colors from fading or bleeding, and is gentler on delicate fabrics.
– Impact of water temperature on different fabrics: Hot water works best for heavily soiled clothes, whites, and linens. Warm water is good for synthetic blends, cottons, and moderately soiled items. Cold water is ideal for dark colors, brights, and lightly soiled clothing.
– Check garment labels: Always refer to the care label instructions before washing any item.
– Pre-treat stains: If you have stubborn stains that won’t come out with regular washing, try pre-treating them with stain remover or soaking them in hot water before washing.
– Test a small area first: Before washing a new garment or one that you’re unsure about its colorfastness or shrinkage potential in hot or warm temperatures.
Now that you’ve adjusted the temperature accordingly based on fabric type and stain level, it’s time to start the machine.
Start the Machine
It’s time to fire up the washer and let it do its magic! Before pressing the start button, make sure that you’ve customized your options according to the type of fabric you’re washing. This will ensure that your clothes come out clean and undamaged.
You can also troubleshoot any start-up issues by checking if the lid is securely closed or if the machine is properly plugged in. Once everything is set up, press the start button and wait for the cycle to finish.
Some washers may have different sounds or indicators depending on their brand, so it’s important to read through your manual beforehand. As a general rule, most wash cycles run for about 30 minutes to an hour.
Don’t be alarmed if you hear some water sloshing around or see some steam coming out from the sides – these are all normal parts of the washing process! Just sit back, relax, and let your washing machine work its magic.
Wait for the Cycle to Finish
You anxiously wait for the cycle to finish, wondering if your clothes will come out as clean and fresh as you hope. It’s important to use this time wisely and manage it effectively.
You don’t want to waste too much time waiting around, but you also don’t want to forget about your laundry altogether. While you wait, try finding ways to entertain yourself.
Maybe you can catch up on some reading or start watching a new show. You can also use this opportunity to tidy up your living space or do some light cleaning. Whatever you choose to do, make sure it doesn’t distract you from checking on the machine periodically so that you can take out your clothes when they’re ready.
Remove Your Clothes from the Machine
Once the washing cycle’s finished, it’s time to remove your clothes from the machine. Before you do so, make sure it’s completely drained of water and has stopped spinning.
Once you’re sure it’s safe to open the door, grab a basket or hamper to store your freshly washed clothes in. If you don’t have a storage option for laundry after removing from the machine, consider investing in some hangers or a drying rack. This will help prevent wrinkling and keep your clothes fresh until you’re ready to put them away.
Additionally, if you prefer air-drying your clothes instead of using a dryer, consider hanging them outside on a clothesline or indoor drying rack. Not only does this save money on energy costs but also helps preserve the longevity of your clothing.
Now that your clothes are safely removed from the washing machine and stored properly, it’s time to move onto transferring them into the dryer (if applicable).
Transfer Your Clothes to the Dryer (If Applicable)
Get ready to give your clothes a warm and cozy hug as you transfer them into the dryer, ensuring they come out fluffy and soft. But before you do that, make sure to avoid common mistakes such as overloading the machine or leaving items like bras with underwires that could damage the dryer drum.
Here are some energy-saving tips you can follow to make sure your clothes come out perfectly dried without putting a dent in your electricity bill:
– Clean the lint filter before every load to ensure proper air circulation.
– Use wool dryer balls or clean tennis balls instead of fabric softeners to reduce drying time and static cling.
– Choose the right drying cycle for your fabrics – delicates need less heat than towels, for example.
– Don’t overdry your clothes – take them out while they’re still slightly damp to prevent shrinkage and wrinkling.
– Consider using a drying rack for items that can’t be tumble-dried like sweaters or shoes.
Once you’ve checked off all these boxes, it’s time to transfer your clothes from the washing machine into the dryer. Open up the washer lid or door and grab each item one by one, shaking them gently to remove any excess water. Make sure there are no trapped socks or underwear hiding in sleeves or pant legs before placing them in the dryer drum.
Once everything is safely inside, close the door and select your desired drying cycle. And voila! Your laundry is on its way to being fresh, clean and dry.
Clean the Machine
Now that you’ve transferred your clothes to the dryer, it’s time to give your washing machine some much-needed attention. Cleaning frequency is an essential aspect of maintaining a washing machine’s longevity and ensuring its efficiency. Neglecting this chore can lead to mold, musty odors, and even rust. However, with effective cleaning methods, you can keep your machine in excellent condition for years.
Firstly, start by removing any debris or lint from the washer drum or lint trap (if applicable).
Then mix equal parts of water and vinegar in a spray bottle and thoroughly spray the inside of the drum before wiping it down with a clean cloth or sponge.
Run a hot water cycle on an empty load with two cups of white vinegar in the detergent dispenser to help eliminate any buildup or bacteria.
Finally, after completing this cycle, run another cycle on high heat using baking soda instead of laundry detergent to help eliminate any remaining odors.
By following these simple steps regularly, you’ll ensure that your washing machine operates efficiently while producing fresh-smelling laundry every time.
Frequently Asked Questions
How often should I clean my washing machine?
To keep your washing machine running smoothly, it’s important to clean it regularly. Cleaning frequency depends on how often you use your machine and the type of detergent you use, but a good rule of thumb is to clean it every three months.
There are a few maintenance tips you can follow to make cleaning easier and more effective. First, always remove any leftover laundry from the drum after each wash cycle. This will prevent mold and mildew from growing inside the machine.
Second, run an empty hot water cycle with white vinegar or baking soda to help dissolve buildup and deodorize the machine.
Finally, wipe down the exterior of the machine with a damp cloth to remove any dust or dirt that has accumulated over time.
By following these simple steps, you’ll ensure that your washing machine stays in top condition for years to come.
Can I use fabric softener with every load of laundry?
Without a doubt, fabric softener is a game-changer when it comes to laundry day. You can almost feel the softness and smell the sweet scents just thinking about it!
But before you pour on the fabric softener with every load of laundry, it’s important to know that not all types of fabric softener are created equal. There are liquid, sheets, and balls – oh my! And how much should you use per load?
Well, that depends on the type of fabric softener you’re using. Liquid requires less than sheets or balls because they’re more concentrated. So be sure to read the instructions carefully and measure accordingly. Don’t overdo it or your clothes may become stiff instead of luxuriously soft.
With these tips in mind, your laundry will come out smelling like a dream and feeling as cozy as ever.
Should I leave the door of the washing machine open after each use?
Leaving the door of your washing machine open after each use can have both benefits and disadvantages.
One advantage is that it allows the drum to air out, reducing the growth of mold and mildew.
However, leaving the door open can also increase energy consumption by allowing cool air to enter the washer and reducing its efficiency.
Ultimately, whether you leave the door open or closed will depend on personal preference and circumstances.
If mold is a concern in your area, leaving it open may be worthwhile; otherwise, it might not make a significant difference.
Consider experimenting with both methods to determine what works best for you.
How do I know if I am overloading my washing machine?
Are you guilty of overloading your washing machine?
Washing machine maintenance is crucial to ensure its longevity and efficiency. One common mistake people make is stuffing too many clothes into the drum, which can lead to damage and poor cleaning results.
To avoid this, try following the manufacturer’s guidelines for load capacity or fill the drum up to about ¾ full. Another tip is to separate heavy fabrics from lighter ones as it’ll help distribute weight more evenly and prevent the machine from vibrating excessively during the spin cycle.
Remember these tips for common washing mistakes and keep your washing machine running smoothly for years to come.
What should I do if my clothes are still dirty after the wash cycle?
If your clothes are still dirty after the wash cycle, there are a few things you can do.
First, consider using pre-treatment methods such as spot cleaning or soaking heavily soiled clothes before washing.
Additionally, make sure you are selecting the right detergent for your specific laundry needs. Some detergents may not be strong enough for heavily soiled clothing or may not work well in hard water. Experiment with different brands and types until you find one that works best for you.
Remember to always follow the manufacturer’s instructions on how much detergent to use and try not to overload the machine with too many clothes at once.
By taking these steps, you can ensure that your clothes come out clean and fresh every time.
Conclusion
Congratulations! You’ve successfully learned how to use a washing machine. Now that you’re familiar with the machine’s parts, it’s time to put your new skills into practice.
Imagine yourself in your laundry room, surrounded by piles of dirty clothes. With confidence and ease, you gather your laundry and pre-treat any stubborn stains.
You load your clothes into the machine and add just the right amount of detergent, knowing that too much can leave residue on your clothes while too little won’t get them clean enough. As you wait for the cycle to finish, you can almost hear the gentle swishing sound of water and soap working together to remove dirt and grime from your clothes.
Finally, it’s done! You remove your freshly washed clothes from the machine and transfer them to the dryer or hang them out to dry in the sun. Don’t forget to take care of your washing machine by cleaning it regularly so that it can continue to serve you for years to come.
By following these simple steps, you’ll be able to keep your clothes looking their best without breaking a sweat. Congratulations again on mastering this essential life skill!