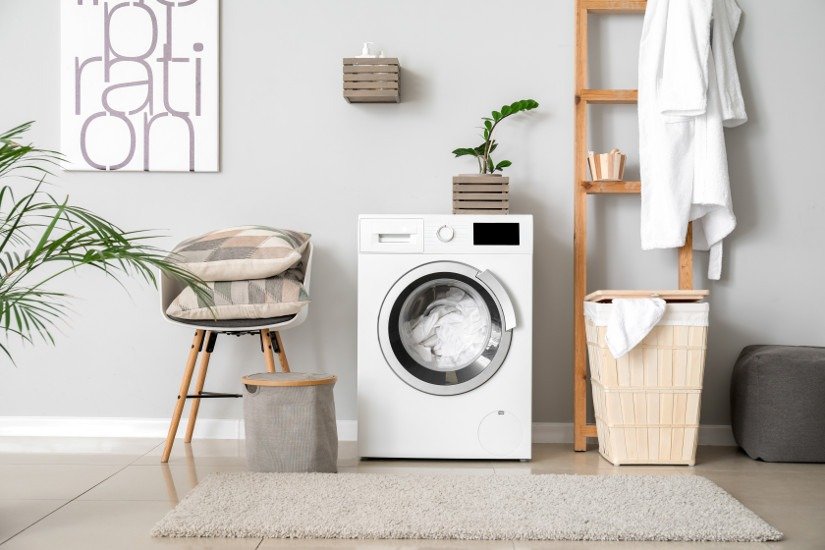
Are you tired of having a washing machine that doesn’t properly drain? Don’t worry, draining your washing machine is a simple process that can save you from future headaches. It’s important to know how to drain your washing machine in case of emergencies or routine maintenance.
In this article, we’ll go through the step-by-step process of draining your washing machine so that it will function properly and efficiently. Before we begin, make sure to turn off the power and water supply to your washing machine. This ensures safety while working on the unit and prevents any unwanted water spillage.
With these precautions in place, let’s get started on draining your washing machine!
Turn off the Power and Water Supply
Before you can safely stop the flow of water and electricity, it’s important to turn off both power and water supply to ensure a smooth and safe process. Safety precautions must be taken seriously as working with electrical appliances involves some risk. To avoid accidents, make sure you unplug your washing machine from the power outlet before proceeding.
Next, locate the water valves behind your washing machine. Turn off both hot and cold water valves by turning them clockwise until they’re tightly closed. This will prevent any remaining water from entering the machine during draining.
Now that you have turned off both power and water supply, you can proceed to prepare the drain hose for draining your washing machine.
Prepare the Drain Hose
You’ll want to grab the long, flexible tube attached to the back of your appliance and carefully guide it towards the nearest water outlet.
Before doing so, make sure to inspect the hose for any damage or wear and tear. Replace old hoses immediately to avoid any leaks or flooding during the draining process.
If your washing machine is located in a basement or an area without easy access to a floor drain, you may need to use a drain pump. This device will help you move water from one place to another quickly and efficiently.
Simply attach the pump’s hose to your washing machine’s drainage tube and turn it on. The pump will suck all of the water out of your appliance, making it easier for you to dispose of properly.
With your drain hose ready, let’s move on to finding a proper location for draining your washing machine.
Find a Drain Location
To choose the right drain spot for your washing machine, you need to look for a drain that’s at least 2 inches in diameter and located near the machine.
Avoid using a floor drain if possible, as it may not be designed to handle the volume of water from a washing machine.
When considering the distance from the machine to the drain, keep in mind that the farther away the drain is, the more likely you’ll need a longer hose or additional plumbing work to connect it properly.
Choose the Right Drain Spot
When it comes to finding the perfect spot for your washer’s water flow, make sure you’re within 4 feet of a grounded electrical outlet and have enough space for a proper venting system to avoid any potential fire hazards.
Did you know that over 15% of house fires are caused by faulty or improperly installed washing machines? Choosing the right hose is also crucial in ensuring efficient water drainage.
Here are some factors affecting drainage efficiency:
1. Hose Length – Make sure that your hose is long enough to reach the drain without stretching or kinking.
2. Hose Diameter – A larger diameter hose allows for faster water flow, but make sure it fits properly with your washer’s connection.
3. Material – Choose a durable material like reinforced rubber or stainless steel to avoid leaks and burst hoses.
4. Positioning – Properly position your hose so that it doesn’t become twisted or obstructed.
Consider the distance from the machine as well when choosing the right drain spot.
The farther away from the machine, the greater risk of clogging and water backup, which can lead to costly repairs or even property damage.
Consider the Distance from the Machine
If you’re looking for a spot to place your washer, it’s important to keep in mind the distance between the outlet and where you plan on installing it. The length of the drain hose is crucial when determining the placement of your washing machine. Considerations for drain hose length will depend on the location of your washer and whether or not it needs to be moved frequently.
To help determine how far away from your washing machine the drainage point should be, you can use a simple table as a guide. By using this table, you’ll have an idea of how long your drain hose needs to be based on different distances from the washer. When measuring for proper positioning for optimal drainage, make sure there’s enough space between the back of your washing machine and any walls or other obstacles that might interfere with water flow. Once you have determined these factors, you can then move onto positioning the drain hose.
Position the Drain Hose
Now it’s time to snake that flexible tube down into the abyss of darkness, giving it freedom to flow and carry away the sudsy remains of your laundry day triumph.
Before positioning the drain hose, consider adjusting its height according to the location of your washing machine’s drainage system. If the outlet is located at a higher level than the machine, you may need to elevate the hose by attaching it onto a hook or bracket mounted on a nearby wall. Conversely, if the outlet is lower than your machine, make sure that you position the hose accordingly to maintain an unobstructed flow.
Choosing materials for your drain hose is also important in ensuring smooth drainage. Opt for hoses made from durable materials like PVC or reinforced rubber as these can handle high water pressures and resist kinking or cracking over time. Additionally, choose a hose with an appropriate diameter that matches your washing machine’s drain outlet size to ensure optimal performance.
Once you have positioned and secured your drain hose properly according to these guidelines, you’re ready to begin the drainage process and effortlessly bid farewell to all those soapy suds!
Begin the Drainage Process
It’s time to bid adieu to all that sudsy mess and let the water flow effortlessly down the hose, taking with it all your laundry day woes. Now that you’ve positioned the drain hose correctly, it’s time to begin the drainage process. Here are some simple steps to follow:
– Turn off the washing machine: To ensure a safe drainage process, turn off the washing machine before starting.
– Open up the filter: Locate the filter cap at the front of your washing machine and unscrew it using a coin or screwdriver. Place a bowl or bucket underneath to catch any excess water.
– Begin draining: Once you’ve opened up the filter cap, pull out the drain hose and place it into a large container for wastewater disposal.
Before moving on to check for clogs, make sure there aren’t any leaks in your setup. Check all connections between hoses and pipes while also inspecting for any cracks or holes in hoses.
Properly dispose of wastewater by pouring it down an appropriate drain or contacting your local wastewater treatment facility if necessary.
Check for Clogs
You may be surprised to learn that over 75% of washing machine clogs are caused by clothing fibers and lint, which can lead to costly repairs and even water damage in your home. That’s why it’s crucial to check for debris before proceeding with the drainage process. Start by inspecting the drain hose for any visible obstructions or kinks. If you find a blockage, use a long-handled tool like a wire hanger to clear the obstruction gently.
To further ensure that your washing machine is free from clogs, refer to this table below for common causes of blockages and how to prevent them:
| Cause | Prevention |
|---|---|
| ——- | ———— |
| Clothing fibers & lint | Use mesh laundry bags or wash smaller loads |
| Dirt & sand | Shake out clothes before washing |
| Soap scum buildup | Use high-efficiency detergent and run monthly cleaning cycles |
| Mineral deposits | Install a water softener |
By taking these preventative measures, you’ll not only avoid costly repairs but also extend the life of your washing machine. Once you’ve checked for debris, it’s time to move on to emptying the drain pan.
Empty the Drain Pan
1) Place a drain pan under the hose in preparation for draining your washing machine.
2) Make sure the pan is large enough to hold all the water that’ll come out of the hose.
3) Empty the pan when necessary to prevent overflowing and potential damage to your floors or appliances.
Place a Drain Pan Under the Hose
Make sure to slide a drain pan under the hose before letting any water out, or else you’ll end up with a big mess on your hands.
Drain pans are essential tools for preventing water damage in case of leaks or spills. They come in different sizes and materials, and they have their own advantages and disadvantages.
For example, plastic drain pans are lightweight and easy to clean, but they can crack over time. On the other hand, metal drain pans are more durable and can withstand high temperatures, but they can rust if not properly maintained.
When choosing a drain pan for your washing machine, consider the size of your appliance and the space available underneath it. Make sure that the pan is large enough to catch all the water from the hose without overflowing or tipping over.
Also, make sure that it has a lip or edge that prevents water from spilling onto your floor. Once you have placed the drain pan securely under the hose, you can proceed with draining your washing machine as needed.
Remember to empty the pan when necessary to avoid bacterial growth or foul odors.
Empty the Pan When Necessary
Don’t forget to check the drain pan regularly and empty it when necessary to prevent any unwanted bacteria or unpleasant odors from building up. Cleaning instructions vary depending on the type of drain pan you have, so make sure to follow the manufacturer’s recommendations.
A good rule of thumb is to empty the pan after every use or at least once a week if you use your washing machine frequently. Maintenance tips for your drain pan include wiping it down with a cloth and mild detergent whenever you empty it. This will help prevent any residue from building up inside the pan and keep it smelling fresh.
Additionally, make sure that the drain hose is securely attached to the washing machine and that there are no leaks in either the hose or the pan itself. By keeping an eye on these details, you can ensure that your washing machine drains efficiently every time.
As you monitor the drainage process, be sure to listen for any unusual sounds or observe any slow draining water which may indicate a problem with your washing machine’s pipes or pump. Regularly checking on these details will enable you to catch small problems before they become big ones – saving both time and money in repair costs down the line!
Monitor the Drainage Process
Keep an eye on how the water is flowing out of the appliance to ensure that it’s draining properly. If you notice any issues with drainage, it’s important to troubleshoot them right away.
Here are some best practices for maintaining a healthy washing machine drainage system:
– Regularly clean the lint filter and remove any debris or build-up
– Check for clogs in the drain hose and clear them if necessary
– Make sure the drain hose isn’t kinked or bent, as this can impede proper drainage
– Adjust the height of the drain hose so that it isn’t more than 96 inches above ground level
– Consider using a drain snake or plumber’s auger to clear any stubborn clogs
By monitoring your washing machine’s drainage process and following these maintenance tips, you can prevent future issues and keep your machine running smoothly.
Next up, we’ll discuss how to clean the machine itself to ensure optimal performance.
Clean the Machine
Now that you’ve ensured proper drainage, it’s time to turn your attention to the cleanliness of your trusty laundry companion. Regular maintenance not only ensures a longer lifespan for your washing machine but also prevents clogs and unpleasant odors from forming.
To start off, clean the detergent dispenser and fabric softener compartments with warm soapy water. It’s essential to use the right type of detergent as well; always refer to the user manual for specific instructions.
Next, tackle any visible dirt or grime on the outside of the machine using a damp cloth or sponge with mild soap. Pay extra attention to areas around the door seal where mold and bacteria can grow.
Finally, run an empty cycle with hot water and white vinegar once every few months to clean out any buildup inside the machine. With these simple steps, you’ll be able to maintain a clean and healthy washing machine for years to come.
As you complete cleaning your washing machine, it’s time now to reconnect the drain hose securely back in place before running another load of laundry.
Reconnect the Drain Hose
It’s important to ensure the secure reconnection of the drain hose before starting your next laundry cycle. Neglecting this step can lead to costly and messy water damage, which is why you should follow these tips for securing the drain hose.
First, make sure that the hose is securely attached to the back of your washing machine. You should also ensure that it’s not kinked or twisted in any way, as this can cause drainage issues.
Next, check that the connection between the hose and your home’s plumbing system is tight and secure. If you’re experiencing drainage issues, try troubleshooting by checking for clogs or blockages in both the hose and pipes.
Once you’ve secured everything properly, you can then turn on the water supply and power before starting your next load of laundry with peace of mind knowing that everything has been taken care of correctly.
Turn on the Water Supply and Power
Once you’ve securely reconnected the drain hose, you can turn on both the water supply and power, ensuring that your laundry cycle will run smoothly.
Before turning on the water supply, check the water pressure to make sure it’s at an adequate level for your washing machine. If it’s too low or too high, adjust it accordingly to prevent any damage to your machine.
Next, secure the power cord into an outlet and turn on the power switch. Make sure all buttons and settings are properly adjusted before starting a cycle.
It’s important to note that some machines may have a delay start option which allows you to schedule a time for it to begin running. Once everything is set up correctly, you’re ready to move onto testing the machine without any issues arising during use.
Test the Machine
To run a test cycle, start by selecting the highest water level and hottest temperature settings.
Add a small amount of detergent and let the machine run through its full cycle.
Check for any leaks or unusual noises during the cycle to ensure the machine is working properly.
Run a Test Cycle
You’ll need to run a quick test cycle to ensure that there’s no excess water left in the appliance.
There are different test cycles you can run for washing machine maintenance, but the most common one involves filling the washer with water and letting it spin for a few minutes before draining it completely. This will help remove any leftover water and prevent mold or mildew buildup in your machine.
It’s recommended to run a test cycle on your washing machine at least once every three months, especially if you use it frequently. Doing so can also help detect any issues early on, such as leaks or unusual noises, which can save you money on repairs in the long term.
Once you’ve completed this step, you can move onto ensuring that the machine is working properly by checking for any signs of damage or wear and tear.
Ensure the Machine is Working Properly
Now that the test cycle is complete, it’s important to check for any signs of damage or wear on the appliance.
Inspect the machine thoroughly for common issues with washing machine drainage such as clogs in hoses or filters, damaged drain pumps, or malfunctioning pressure switches. These issues can cause water to back up and prevent proper draining.
To prevent drainage problems in washing machines, there are a few tips you can follow.
First, avoid overloading your washer with too many clothes as this can put strain on the machine and cause drainage problems. Additionally, make sure to clean out lint traps regularly and use only high-quality detergent to prevent buildup in your machine’s internal parts.
By taking these simple steps, you can ensure that your washing machine remains in good working order and drains properly every time.
Frequently Asked Questions
How often should I drain my washing machine?
If you want to keep your washing machine in top working condition, regular maintenance is crucial. This includes draining the machine periodically to prevent mold buildup and ensure that it’s functioning properly.
Most experts recommend doing this at least once every six months, although some suggest every three months for high-use machines or those located in humid environments.
To drain your washing machine, simply turn off the power and water supply, disconnect the hoses, and let any remaining water run out into a bucket or drain. It’s a simple task that can save you time and money in the long run by preventing costly repairs and keeping your clothes clean and fresh-smelling.
So don’t neglect your washing machine maintenance – take care of it regularly and enjoy its benefits for years to come!
What do I do if I can’t find a suitable drain location for my washing machine?
If you’re unable to find a suitable drain location for your washing machine, don’t worry! There are alternative drainage options available to you.
One option is to install a standpipe, which allows water to flow directly into a pipe that’s connected to your home’s plumbing system. This can be accomplished with a few basic tools and some plumbing knowledge, but if you’re not comfortable doing it yourself, consider hiring a professional plumber for installation.
Another option is to use a portable washer that doesn’t require any hookups or permanent installation. This can be especially useful if you live in an apartment or rental property where installing plumbing fixtures may not be allowed.
Regardless of the route you choose, there are plenty of solutions available to ensure your washing machine is draining properly without causing any unnecessary stress or frustration.
Can I use any type of drain pan for my washing machine?
When it comes to choosing the right type of drain pan for your washing machine, there are a variety of options available on the market. The two main types of drain pans are plastic and metal, each with their own set of pros and cons.
Plastic drain pans tend to be more affordable and lightweight, making them easy to install and replace if needed. However, they may not be as durable or long-lasting as their metal counterparts.
Metal drain pans, on the other hand, are often more expensive but offer greater durability and strength against potential leaks or spills.
Ultimately, the type of drain pan you choose will depend on your specific needs and preferences. So don’t hesitate to do some research and find the right option that fits like a glove!
Is it safe to use chemicals to clean my washing machine before draining it?
If you’re considering using chemicals to clean your washing machine, it’s important to weigh the potential risks against the benefits.
While bleach can be an effective cleaner for removing stains and mold from your machine, it also has a significant environmental impact and can be harmful to human health if not used properly.
Instead, consider using vinegar as a natural alternative that is both safe for the environment and effective at cleaning your machine.
Simply add a cup of white vinegar to your machine’s detergent dispenser and run it on the hottest setting.
Not only will this help remove any buildup or odors in your machine, but it will also leave it smelling fresh and clean without posing any unnecessary risks to yourself or the planet.
Can I drain my washing machine without disconnecting the power supply?
Did you know that over 60% of washing machine malfunctions are caused by improper draining methods? It’s important to take safety precautions when draining your washing machine, but there are alternate methods that don’t require disconnecting the power supply.
One such method is using a bucket or hose to manually remove the water from the machine. However, it’s crucial to ensure that all electricity is turned off before attempting this method.
Another option is using a wet-dry vacuum to suck out the water, but be sure to use caution and follow manufacturer instructions carefully.
Remember, proper draining techniques can prevent costly repairs and extend the lifespan of your washing machine.
Conclusion
Congratulations! You’ve successfully drained your washing machine. Now it’s time to reconnect the drain hose and turn on the water supply and power.
Take a moment to test the machine by running a quick cycle to ensure that everything is functioning as it should.
Cleaning the machine after draining is an essential step in maintaining its longevity. Clear any debris or lint from the filters and wipe down both the inside and outside of the washer with a damp cloth.
Remember, regular maintenance will not only extend the life of your washing machine but also save you money in costly repairs down the line.
With these easy-to-follow steps, you can confidently tackle draining your washing machine whenever necessary. So go ahead, give yourself a pat on the back for being proactive in keeping your appliances in tip-top shape!