Cleaning your vacuum filter is one of those jobs that is easy to keep putting off until it’s too late. One day you’ll notice that your trusty vac isn’t cleaning as well as it used to, even though you’ve just emptied it. The chances are that it’s time to clean out the filter.
While vacuums can vary widely in their design, most have an easily removable filter. Its job is to prevent the smaller particles from clogging the mechanism or being passed back onto your carpet from the air vent.
With some simple precautions and a little time, you can effectively clean any vacuum filter without getting dust all over your clothes and recently cleaned carpet. These tips will improve the cleaning power of any vacuum with a dirty or clogged filter.
The different types of vacuum filter
Manufacturers often design filters to fit only one model of vacuum cleaner. A tight fit ensures complete filtration, so it stands to reason that they should mould them to fit the machine they designed them for. However, despite their differences, most filters can fit into a few categories. Knowing which yours falls into will help you to find the most effective way to clean it.
Cartridge filter
These are designed to be easy to remove and replace. They usually have a short lifespan; some companies create them for you to reuse, others you need to replace when they become clogged. They are often cylindrical or circular with folder card or filtration material. The folds increase the area of the filter, making it more efficient.
Cleaning tip – Even single-use filters can be reused if you clean them and treat them with care. Try not to get cartridge filters wet.
Cloth filter
These are hard wearing and easy to clean. Made from durable fabric, you can use them multiple times and many last as long as the vacuum.
Cleaning tip – Use warm soapy water and a firm sponge to get the best results.
Foam filter
These are usually just pieces of stiff foam cut to the shape of the area they fit. They aren’t the most efficient filter, so they are often in place as a backup or secondary filter.
Cleaning tip – Unless your manufacturer’s instructions say otherwise these are best soaked in warm soapy water.
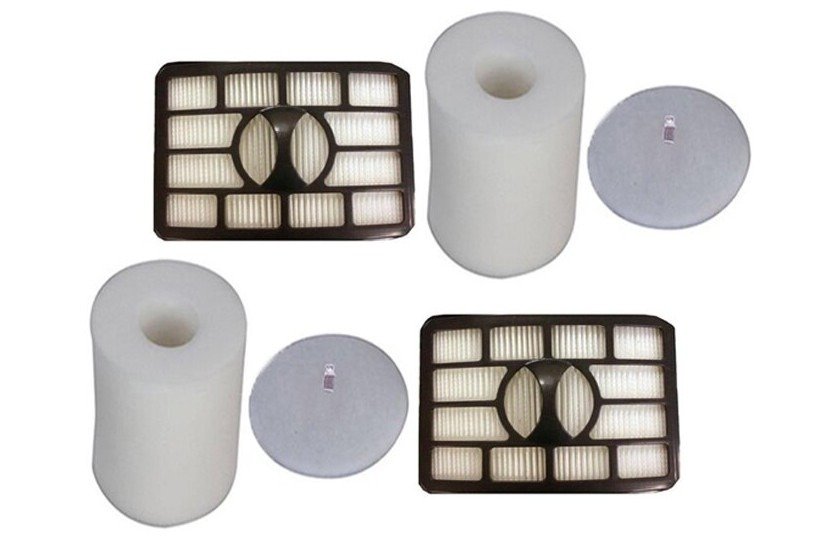
Disk filters
Made in the shape of a flat disk these can be fabric or paper. They can hold a large amount of dirt and dust but typically they are easy to clean.
Cleaning tips – If they are made of cloth, soak them in warm soapy water and gently scrub using a firm sponge. If they are paper, they should not be allowed to get wet.
HEPA filters
High-efficiency particulate air (HEPA) is a description officially given to filters that can trap most of the tiny particles found in the air. To be effective, they must be used in a HEPA vacuum so that the air pathway is secure. HEPA vacuums are an excellent choice for places where air quality is essential or if someone in your household has asthma.
You can purchase HEPA filters separately, but they are only truly effective in specialist machines. Many popular brands like Shark, Dyson, Soniclean, Hoover and Miele all produce at least one HEPA vacuum in their range.
A step-by-step guide for cleaning any vacuum filter
This method can be easily used for any filter. Depending on the shape and material your filter is made from, you may need to make some small adjustments. This process will have most filters working at full capacity again in just a few minutes.
What you will need
Before you get started, you’ll need a few essential tools that will make the cleaning efficient and less time-consuming.
For cloth or foam filters:
- Washing up liquid or mild laundry detergent
- Firm sponge
- Toothbrush
- Microfiber cloth
Paper or cartridge filters:
- A dry cloth or a slightly damp microfiber cloth. Wring it out thoroughly, the damp is to attract the dust, and you mustn’t get the filter wet.
Step 1: Remove the filter
When you buy a new machine, it is useful to get to know how everything comes apart and fits together again. If you are unsure of how to remove the filters, start by removing any dust bags or bagless containers. Look out for any access that will lead you to the filters. Most filters clip-in so if you find yourself undoing screws you’ve probably gone too far.
Once you’ve found the filter, gently feel around the edge and see if it is clipped in. Put pressure on the clips to loosen them and pull the filter free. Most clips should release with gentle pressure, if they don’t come loose check to see if you have missed a catch. Proceed carefully, so you don’t break anything. If you notice any damage to the filter or fittings, it may be time to consider a replacement.
Step 2: Remove any excess dust from the filter
After you’ve taken the filter out, take it outside with a bin or large bin bag. Knock it firmly against the side of the bin, so the dust falls inside it. If you have a bin bag, put the filter inside the bag and knock it against something firm, so the dust stays in the bag. This will stop the dust covering the surfaces in your house or getting into your face or clothes.
Then, knock the filter several times until no more dirt is dislodged. After this, run a soft toothbrush over the entire length of the filter focusing on the sides. This will further loosen any deeply lodged particles on the filter’s surface. Finally, wipe all sides with the microfiber cloth to remove any remaining trapped dirt.
Step 3: Rinse the filter
This step is only advisable for cloth or foam filters. If your filter is made from paper or card, or the instruction manual advises against it, they shouldn’t be allowed to get wet. If they do get wet, they will likely stop working and need to be replaced.
Rinse the filter in warm soapy water. Move it around to let the water flow through it. Squeeze it gently several times. If necessary, keep changing the water. When the water coming out of the filter runs clear, swap the soapy water for clean water and rinse out the bubbles.
After washing the filter, you need to let it air dry before inserting it back in the vacuum cleaner. Ensure that it is completely dry before reinstalling.
Step 4: Reinstall the filter
Place the filter back in position and push firmly until it clicks into place.
Cleaning Robot Vacuum filters

Companies like Kobold, Roomba, Neato and Eufy produce robot vacuum cleaners that can clean your home entirely independently. Despite their difference with the usual vacuum cleaner, they still require filters which should be checked and cleaned regularly. It is recommended to check after three or four uses but if you forget, keep an eye out for signs that your machine isn’t getting the dirt up like it used to.
Filters in robot vacs are usually more compact than other machines but the same cleaning procedure applies. For smaller filters, a toothbrush is your best ally. Use it to get in all the small corners and thoroughly clean all the dust before returning it to the machine.
Vacuum filter do’s and don’ts
Here are some useful things to keep in mind as you clean your vacuum filter:
- Don’t use cleaning tools that are too abrasive; they may cause permanent damage to the filter material.
- Clean your filter regularly. Using a vacuum with a dirty filter is less effective and can recirculate dirt and dust into your home.
- If you clean your vacuum filter and it still doesn’t pick up, try removing the brush and other accessible parts and giving them a thorough clean.
- If you know your vacuum and filters are clean but it still has an unpleasant smell, try adding a few drops of your favourite essential oil to the filter. The heat from the motor will cause a pleasant scent to be released every time you vacuum.
Final thoughts
Cleaning a vacuum filter is a straightforward yet necessary way to keep your machine working at its best. Once you’ve done it a few times, you will quickly become an expert at knowing exactly what works well for your vacuum.
If you do it regularly, not only will your vacuum be more effective but you may prolong its life as well. All in all, cleaning your vacuum filter is a job well worth doing.